PCFreak Logo (c) Der PCFreak

Archive for the 'Windows' Category


Windows 7 Bootzeiten drastisch reduzieren Kommentare deaktiviert für Windows 7 Bootzeiten drastisch reduzieren

Windows 7 hat eine interne Optimierung, die mitunter die Bootzeiten drastisch reduziert. Leider kann es je nach Auslastung des Systems vorkommen, dass Windows diese Optimierung nie durchführt, da vor allem sehr ausgelastete Systeme eben nie „idle“ sind. Hier hilft es weiter, diesen Prozess manuell anzustarten:

  start /wait Rundll32.exe advapi32.dll,ProcessIdleTasks

Nach einiger Wartezeit startet das System merklich schneller! Es empfielt sich übrigens auch, diesen Befehl auch vor dem Imagen einer Musterinstallation abzusetzen um allen zukünftigen Nutzern des Images bereits von Anfang an schnelle Bootzeiten zu ermöglichen.

Eine weitere Bremse können Netzlaufwerke sein.
Es kursiert das Gerücht, dass folgender Registry Key:

  HKEY_CURRENT_USER\Software\Microsoft\Windows\CurrentVersion\Explorer\Advanced
  DWORD 32bit
  NoNetCrawling = 1

die Bootzeiten drastisch beschleunigen soll, leider ist das Gegenteil der Fall, Windows 7 bootet damit sogar noch langsamer, also einfach vergessen!

Stattdessen folgenden Registry-Key setzen, dieser stellt ein, dass Netzlaufwerke erst dann wieder verbunden werden, wenn man sie nutzt:

  HKLM\SYSTEM\CurrentControlSet\Control\NetworkProvider
  DWORD (32bit)
  RestoreConnection = 0

Probiert es einfach mal aus, die obigen 2 Tipps beschleunigen den Bootvorgang wirklich!

Fehlender Schlüssel HKCU\Software\Classes – ACCESS DENIED Kommentare deaktiviert für Fehlender Schlüssel HKCU\Software\Classes – ACCESS DENIED

Ich hatte das Problem, dass bei einem Windows 7 System der Schlüssel „HKEY_CURRENT_USER\Software\Classes“ nicht zugänglich war. Aufgefallen ist das aber erst bei der Installation eines neuen Programms. Da ich wegen der Fehleranalyse sowieso schon den Process Monitor von Sysinternals angeworfen hatte, dache ich mir, das Problem wirst du jetzt lösen.

Zunächst aber ein paar Hintergrundinformationen:

„HKEY_CURRENT_USER\Software\Classes“ ist kein Registry-Schlüssel sondern ein Registry-Link, der beim Anmelden des Benutzers durch die „Winlogon.exe“ erzeugt wird. Das kann man ganz leicht nachprüfen, da sich in der Datei „ntuser.dat“ (ruhig mal von einem anderen Account aus als Hive laden) dieser Schlüssel nicht befindet.

Der Registry Link „HKEY_CURRENT_USER\Software\Classes“ zeigt eigentlich auf „HKEY_USERS\<user-SID>_Classes“. „HKEY_USERS\<user-SID>_Classes“ wiederum kommt aus der Datei „%userprofile%\AppData\Local\Microsoft\Windows\UsrClass.dat“.

Nun also zurück zu meinem Problem:
Bei meinem Benutzeraccount fehlten sämtliche Unterschlüssel von „HKEY_CURRENT_USER\Software\Classes“. Der Schlüssel „HKEY_USERS\<user-SID>_Classes“ für diesen Benutzer war aber vorhanden und konnte mit einem administrativen Account eingesehen werden.

Ich vermutete ein Rechte-Problem und habe (während ich mit Process Monitor die Registry auf ACCESS_DENIED prüfte) einfach mal im Schlüssel „HKEY_USERS\<user-SID>_Classes“ versucht, die Berechtigungen komplett durchzuvererben.

Tatsächlich spuckte der Process Monitor bei einigen Schlüsseln einen „ACCESS_DENIED“-Fehler aus. In meinem Fall waren es einige Schlüssel unterhalb von „HKEY_USERS\<user-SID>_Classes\VirtualStore\MACHINE\SOFTWARE\Wow6432Node“.

Für die betroffenen Schlüssel musste ich zunächst den Besitz übernehmen und dann die Rechte abändern. Zum Schluss lief dann die Rechtevererbung ohne Fehler durch und der Process Monitor zeigte auch keine Probleme mehr an.

Zusätzlich habe ich noch überprüft, ob der Benutzer überhaupt Schreibrechte für die Datei „%userprofile%\AppData\Local\Microsoft\Windows\UsrClass.dat“ hat, das war der Fall.

Nachdem ich den Benutzer abgemeldet und neu angemeldet hatte, waren wieder alle Unterschlüssel unter „HKEY_CURRENT_USER\Software\Classes“ vorhanden.

Ich vermute das Problem kam dadurch, dass jemand eine etwas betagte Software als Domänen-Administrator installiert hatte. Ich bin froh, dass es jetzt funktioniert.

Dieser Artikel hat mich auf die richtige Spur geführt, deswegen möchte ich ihn hier auch nochmal erwähnen:
Troubleshooting the Missing Classes Root Key…

Check if VBScript runs with correct interpreter cscript.exe/wscript.exe 2

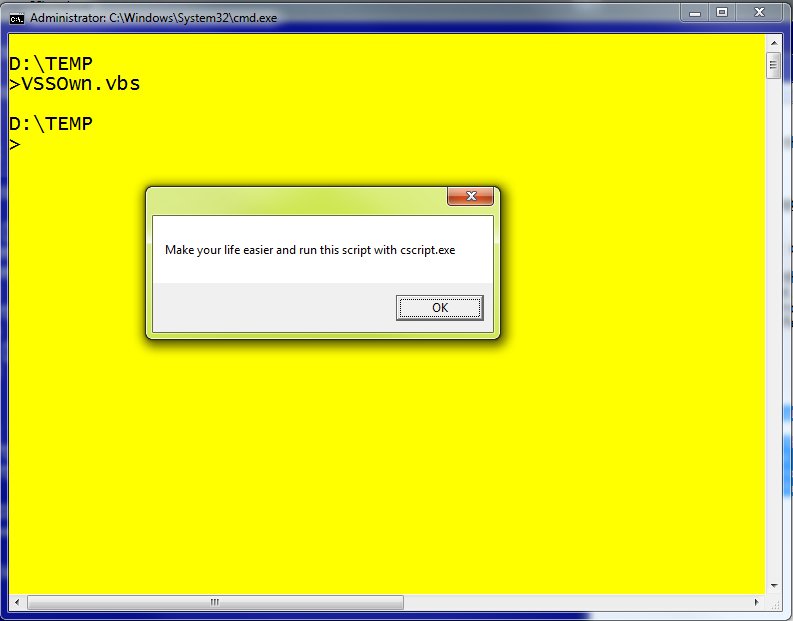
If you ever want to make sure, that your VBScript gets executed with the correct interpreter, just add the following code to your script header:

  Set args = WScript.Arguments
   ‚check if executed with cscript
   if UCASE(right(wscript.fullname,11)) <> „CSCRIPT.EXE“ then
   ‚Thanks to PCFreak from germany for that!
   Msgbox „Make your life easier and run this script with cscript.exe“
   WScript.Quit
  end if

This will prevent the ugly popups! Change „CSCRIPT.EXE“ to „WSCRIPT.EXE“ if you want to check the other way.

Most sophisticated utilman exploit for Teensy and other HID emulators 2

These days it is very cheap and easy to to build your own „evil“ USB-dongle that emulates a USB HID (Human Interface Device) and sends keystrokes. You could use the very easy to program „USB Rubber Ducky“ or the cheaper „Teensy USB Development Board„. So you now have a very nice „Phantom Keystroker“ that you can use for pen testing.

You could find many payloads for the „Ducky“ and also for the „Teensy“ on the internet. For me, the most interesting payload was the „Utilman exploit“ for Windows 7, but I was not comfortable with the way it worked.

  • take ownership fo utilman.exe
  • change permissons of utilman.exe
  • replace utilman.exe with something else (cmd.exe)

A sample payload, that does exactly this can be found here: Utilman Exploiter by Xcellerator for the „Ducky“

This is a huge change to the operating system and you leave your marks on the target system. So how could we do the same without going to deep into the target system? ….. I remembered a registry key that could exactly do that!!!

If you want to run CMD.EXE everytime the system tries to execute UTILMAN.EXE just add the following registry key:

HKEY_LOCAL_MACHINE\SOFTWARE\Microsoft\Windows NT\CurrentVersion\Image File Execution Options\Utilman.exe
REG_SZ: Debugger VALUE: cmd.exe

Now every try to execute UTILMAN.EXE will result in opening CMD.EXE instead. It even works if you type UTILMAN (without the extension).

Based on this knowledge, it is now very easy to write a payload for our „Phantom Keystroker“, that:

  • Press WIN key
  • Enter „cmd.exe“
  • Press „APP“ key
  • press „a“ (will do Run as Administrator)
  • press „LEFT“ (brings cursor on YES on UAC prompt)
  • press „ENTER“ (to open the administrative CMD.EXE)
  • enter a command that sets the registry key
  • enter EXIT to close the command prompt

This was very easy to accomplish by using the Teensy 2.0.

Here you can download the working exploit for Teensy 2.0 here: Most_Sophisticated_Utilman_Exploit.zip


Here a post in the hak5-Forum with a working exploit for the USB Ruberducky.

The following video will show you how to run CMD.EXE instead of UTILMAN.EXE just by adding a registry key!

Video of a possible attack.

Links
Inside ‚Image File Execution Options‘ debugging
Launching the debugger automatically

PCFreak mentioned at HAK5 podcast Kommentare deaktiviert für PCFreak mentioned at HAK5 podcast

My opinion always is and was „Give the internet something back“, so I decided to write to feedback@hak5.org and tell them about the tool I wrote to fix the LNK-File problem. See also my previous article „Release the explorer handbrake„.

I was very impressed when I got back the email from Darren telling me:

> Dude thanks so much for sending this by it’s awesome. I’ll be
> featuring it on an upcoming show. I used to always run into that
> problem when I was a sysadmin. Hated XP for that. You’re doing a great
> service to everyone :)…

So here it is, he read my mail on the Hak5 podcast. Thank you HAK5 for taking my post.
Take a look at 03m36s.

Link: HAK5 podcast episode 1018.1 at 03m36s

Warning wallpaper for administrative users Kommentare deaktiviert für Warning wallpaper for administrative users


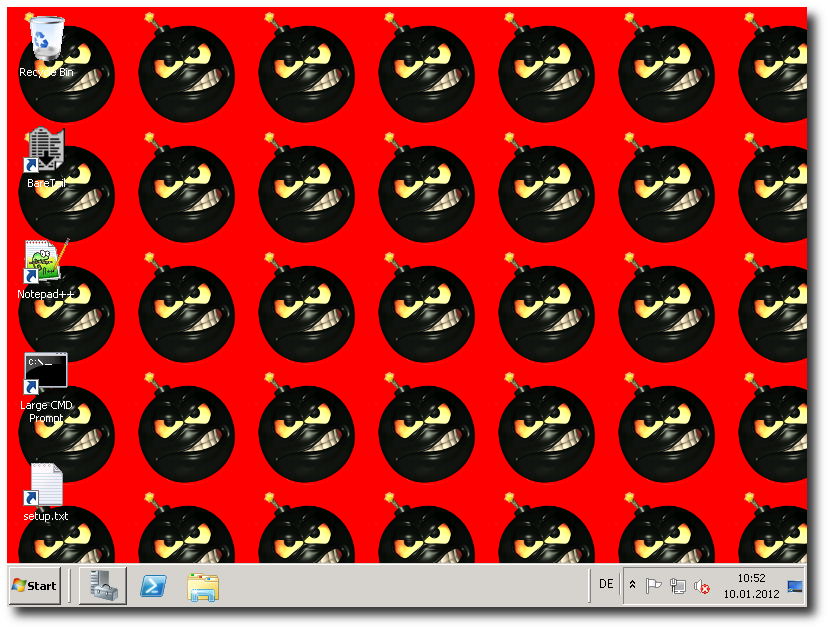
I liked the idea of having a „bomb“ as wallpaper if a user has administrative rights to show the user: „Be careful what you do!“.
I saw this on some linux distributions when you logged on to the X-Server as user „root“ you get bombs as wallpaper to remind you about your responsiblity.

I created a small AutoIT Script that includes a wallpaper image of a „bomb“. When executed it checks:

  1. Has the user administrative rights?
    If so, we set the „bomb“ wallpaper and exit
  2. If the user has no administrative rights (maybe if UAC is turned on)
    we check if the user is member of the group with the SID S-1-5-32-544.
    This is the representation of the localized Administrators group.
    If the user is a member of this group we also set the „bomb“!

To setup this eg. on a server machine, just place the executable in the autostart folder for „All Users“ and logon. If one of the 2 checks applies you will see a „bomb“ as wallpaper. The wallpaper is set per user.

A great challenge was to get the name of the local administrators group via the SID to make sure this program will work on any localized version of windows, too. The source code is included. Use the program at your own risk!

Downloadlink: bomb_wallpaper_for_admins (with UAC).zip

NetDrive – FTP und WebDAV als Laufwerk einbinden Kommentare deaktiviert für NetDrive – FTP und WebDAV als Laufwerk einbinden

NetDriveDie für den Heimgebrauch kostenlose Software NetDrive™ von BiDrive Inc. erlaubt es FTP- oder WebDAV-Server unter Windows als Laufwerke einzubinden. Dadurch kann man mit den Remote-Laufwerken direkt mit dem Windows Explorer arbeiten oder mit anderen Programmen direkt darauf zugreifen. Die Laufwerke können direkt beim Windows Start eingebunden werden. Das Programm ist lauffähig unter Windows XP, VISTA, 7, Windows Server 2003 und Windows Server 2008. Es werden sowohl 32- als auch 64bit-Betriebssysteme unterstützt. Entwickler können auch das käuflich erwerbliche SDK verwenden um die Funktionalitäten in eigene Programme einzubinden.
Homepage: http://www.netdrive.net/

PureSync – kostenloses Synchronisationstool Kommentare deaktiviert für PureSync – kostenloses Synchronisationstool


PureSync (vormals FireSync) sychronisiert Dateien und Ordner. Die Synchronisation erfolgt entweder automatisch, zeitgesteuert oder manuell. Jeweils vor und nach dem Start der Synchronisation erhält man ein Fenster, welches die Änderungen darstellt. Unter anderem unterstützt das Programm auch den Batchbetrieb und Netzlaufwerke. Es kann das Einstecken eines USB-Sticks automatisch erkennen und dann starten. Eine sehr nette Funktion, ist die Möglichkeit im Ziel die Dateien anhand ihres Datums in Ordner zu strukturieren. Das ist sehr hilfreich beim Herunterladen von Bildern, z.B. von einer Kamera. Das Programm ist mehrsprachig, es stehen die Sprachen Deutsch, Englisch, Spanisch, Französisch, Italienisch, Holländisch, Norwegisch, Slowakisch und Schwedisch zur Verfügung. Für den privaten Gebrauch ist das Programm kostenlos. Mehr dazu auf der Homepage von PureSync.

Pre-Installing Geeksphone Zero Drivers to Windows 7 before initial plugin of device Kommentare deaktiviert für Pre-Installing Geeksphone Zero Drivers to Windows 7 before initial plugin of device


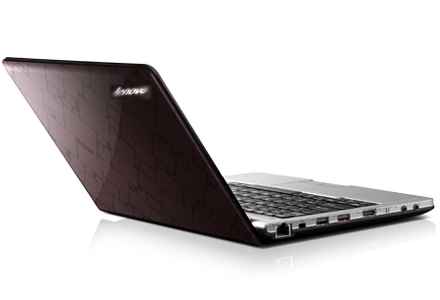
My girlfriend has a Geeksphone Zero (and it runs stable since I put SuperOSR on it…). Now she got a new notebook, a Lenvo S205 and I wanted to pre-install the Geeksphone drivers before the Geeksphone has ever been connected to the machine. As I found out, there is a way and here is how:

First of all get the drivers from the Geeksphone Forum: http://forum.geeksphone.com/index.php?topic=1830.0
The links are:

ZERO DRIVERS NT
  http://www.geeksphone.com/zerohome/ZERO_DRIVERS_NT.rar
  http://www.megaupload.com/?d=V0W1DLM9

Unzip the drivers, then open a CMD.EXE as Administrator, jump the the folder with the extracted files.
Please make sure, that you are in the correct folder when executing the following command (modify with your extraction path):

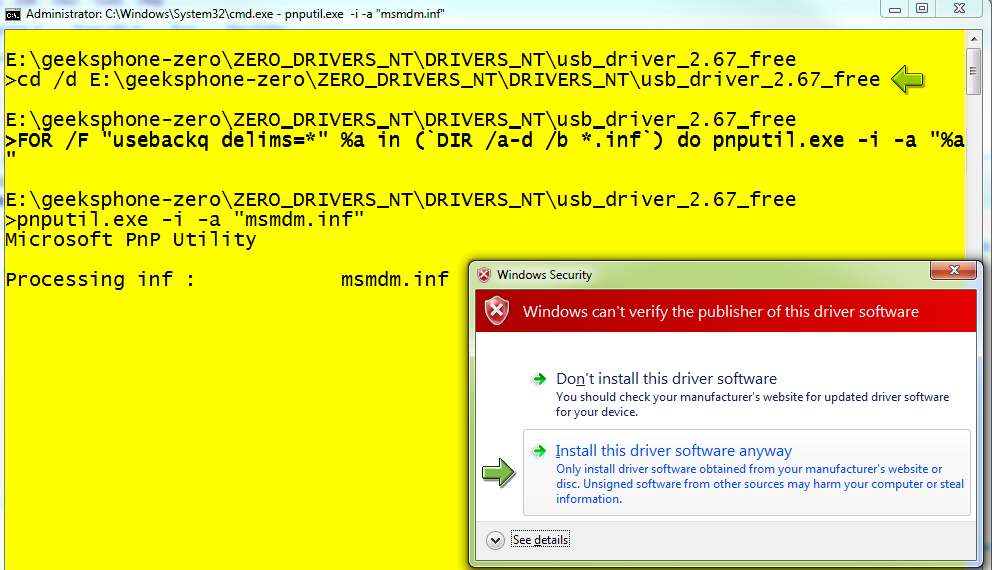
 CD „E:\geeksphone-zero\ZERO_DRIVERS_NT\DRIVERS_NT\usb_driver_2.67_free“
 FOR /F „usebackq delims=*“ %a in (`DIR /a-d /b *.inf`) do pnputil.exe -i -a „%a“

For each driver staging into the windows device database you will get a popup asking you for confirmation to install the drivers, since they are not signed as shown in this screen:

Select „Install this driver software anyway“ for all the drivers you install at this point.

After installation if you plugin a Geeksphone Zero all drivers needed will already present and all devices will be detected without further questions. Good! – If your girlfriend has a geeksphone, like mine does.

On Windows XP you should just be able to right-click the *.inf files and select „install“ to copy them to your system.

This article is in English to support a larger community. Use Google Translate to translate to your language

Lenovo S205 DOS mit Windows 7 upgraden und Lenovo OneKey Recovery ermöglichen Kommentare deaktiviert für Lenovo S205 DOS mit Windows 7 upgraden und Lenovo OneKey Recovery ermöglichen

In dieser Anleitung möchte ich kurz beschreiben, wie ich auf einem Lenovo S205 (279,00 Euro), welcher mit DOS ausgeliefert wurde, ein Windows 7 Home Premium 32Bit installiert und sämtliche Funktionalitäten (inkl. OneKey Recovery) wie beim gleichen Modell mit Windows 7 (S205 M63D8GE) aktiviert habe.

Die wichtigste Vorbereitung ist bevor man Änderungen vornimmt, die komplette Festplatte mit einem Imaging-Tool (in meinem Fall Acronis TrueImage) zu sichern. Ich empfehle auf ein Netzlaufwerk zu sichern, dann dauert das ganze nicht länger als 10 Minuten. Dieses Image heben wir uns gut auf! Ich habe vom S205 auf ein Samba-Share gesichert und eine Datei mit einer Größe von 3.5GByte erhalten. Wichtig für uns ist später die im Backup enthaltene OneKey Recovery Partition (Partitionstyp 12).

Als Nächstes habe ich ein USB-CD-ROM-Laufwerk angesteckt und per F12-Bootmenü von diesem eine Windows 7 Home Premium Deutsch DVD angebootet. Ich habe das Setup bis zur Auswahl der Partition auf die installiert werden soll durchgeführt und bin dann mit Shift+F10 in eine CMD-Shell gewechselt. Dort habe ich dann das Partitionslayout verändert. (Pech, dass ich mich nicht mehr erinnern kann, deshalb versuche ich hier eine Lösung zu beschreiben die immer funktionieren sollte).

Es sollte klappen, wenn man alle Partitionen löscht und dann die gesamte Festplatte für die Installation von Windows 7 bereitstellt. Dann erst mal Standardsetup von Windows 7 durchführen und die gesamten Treiber und so weiter installieren.

Wenn das System sauber läuft, müssen wir die Partitionierung so verändern, dass das Partitionslayout wie folgt aussieht.

  System-reserviert 100 MB NTFS
  C: 252,91 GB NTFS
  D: 29,00 GB NTFS
  REST FREI

Ich habe also einfach die Systempartition um ca. 45GByte verkleinert und dann dahinter aus diesen 45GByte das Laufwerk D: erzeugt und mit NTFS formatiert. Das Label „LENOVO“ habe ich manuell gesetzt.

Nun müssen wir den restlichen Platz (ca. 16,08 GByte) nocht als OEM-Partition einrichten. Dazu booten wir wieder in unser Disk-Imaging-Tool (z.B. Acronis) und stellen manuell nur die OEM-Partition wieder her und zwar so, dass sie den kompletten Platz von 16,08 GByte also den restlichen freien Festplattenplatz am Ende der Festplatte einnimmt. Das ist mit Acronis Disk Image im manuellen Modus problemlos möglich.

Als Ergebnis sollten wir nun folgendes Partitionslayout erhalten:

Wichtig ist der Type der 16Gbyte Partition, dieser muss als „OEM-Partition = Type 0x12“ angezeigt werden.

Nun machen wir einen Test. Wenn wir das Gerät ausschalten und anstatt dem Einschalter (links) mit einem spitzen Gegenstand den Recovery-Button (rechts) drücken, sollte das Gerät in die Recovery-Partition booten und uns die Möglichkeit für eine Systemwiederherstellung geben. Diese funktioniert jedoch noch nicht, da wir noch keine Systemsicherung durchgeführt haben, also beenden wir das Programm zunächst einmal hier.

Jetzt starten wir wieder Windows und installieren (falls noch nicht geschehen) „Lenovo OneKey Recovery“. Danach erstellen wir mit OneKey Recovery eine Systemsicherung (diese wird dann im versteckten Ordner „D:\Lenovo\OneKey App\OneKey Recovery“ erstellt und steht dann eben auch zur Verfügung, wenn wir in die System-Recovery-Partition booten.

Ich empfehle nun noch unter Windows mit OneKey Recovery 7.0 Wiederherstellungsdiscs zu erstellen. Mit diesen Discs kann man später das System (inklusive aller Partitionen) wieder auf den jetzt erzeugten Zustand zurücksetzen. – Voila!

Was man nicht hinbekommt ist der EFI-Boot und die Systemoptimierung für schnelleres Booten, da Lenovo hierfür ein speziell modifiziertes Windows mit EFI-Boot und ein geändertes BIOS verwendet, aber ganz ehrlich, das kann ich verschmerzen.
« Vorherige SeiteNächste Seite »