Wenn dir dein Virenscanner nicht hilft – Hilf dir selbst! Kommentare deaktiviert für Wenn dir dein Virenscanner nicht hilft – Hilf dir selbst!
Folgene Email schlug heute im Posteingang auf. Normalerweise hätte ich sie sofort gelöscht, da ich
- kein Kunde bei der Deutschen Bank bin,
- die Deutsche Bank bestimmt nicht als brucebaldwin-at-shaw.ca verschickt,
- und die Deutsche Bank bestimmt korrekt mit deutschen Umlauten umgehen kann.
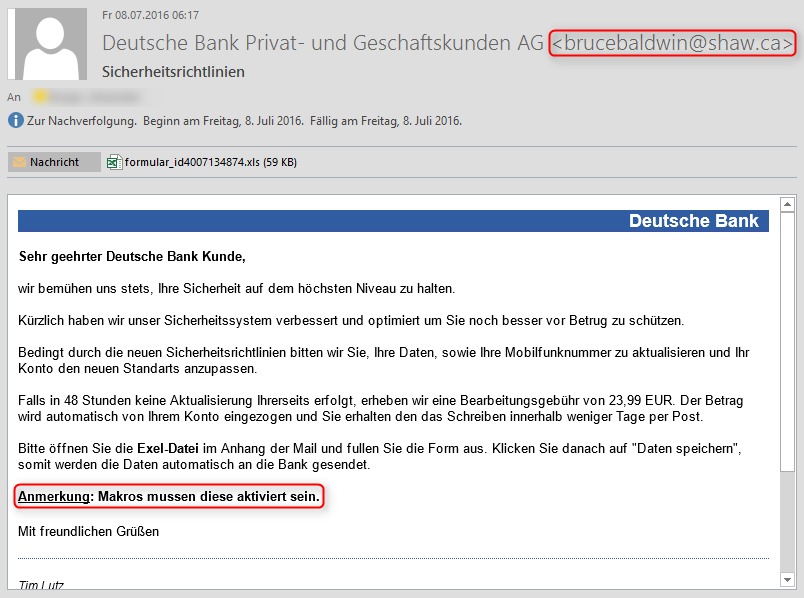
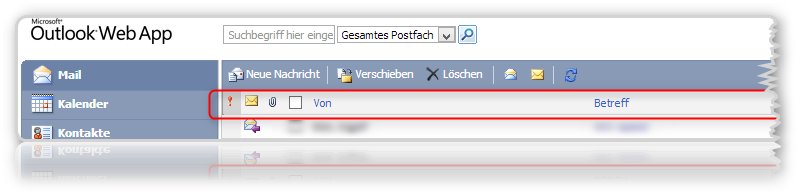
Deutsche Bank Fake Email
Aber ich dachte mir, es kann nicht schaden, die angehängte Excel-Datei mal bei Virustotal hochzuladen, doch entgegen meiner Erwartung zeigten alle 53 Virenscanner kein Ergebnis, die Datei ist also anscheinend sauber oder sagen wir besser, sie enthält vmtl. keinen Schadcode, aber trotzdem wurde nun mein Interesse geweckt und ich analysierte weiter.
Zunächst benutzte ich das Tool OfficeMailScanner, es erkannte keine verdächtigen Inhalte in der angehängten Excel-Datei, danach öffnete ich das Excel-Dokument mit einem Texteditor und fand folgende Textpassagen:
- http://schemas.microsoft.com/cdo/configuration/sendusing;mail.arnes.si
- http://schemas.microsoft.com/cdo/configuration/smtpserver
- http://schemas.microsoft.com/cdo/configuration/smtpserverport
- http://schemas.microsoft.com/cdo/configuration/smtpauthenticate
- http://schemas.microsoft.com/cdo/configuration/sendusername
- http://schemas.microsoft.com/cdo/configuration/sendpassword
Ich konnte also davon ausgehen, dass in der Excel-Datei irgendetwas versuchen wird eine Email zu schicken.
Im Anschluss traute ich mich dann das Dokument in einer kontrollierten Umgebung und mit deaktivierten Makros in Excel zu öffnen und es war (wie erwartet) ein in Excel eingebettetes Formular.
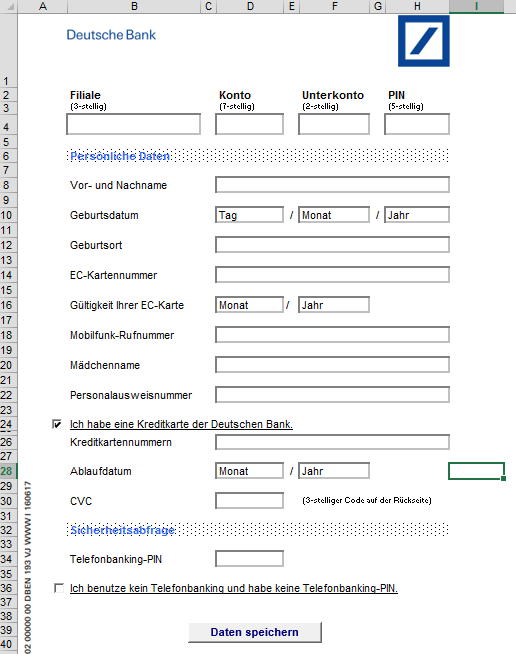
Deutsche Bank Fake Formular in Excel
Über die Entwicklertools wollte ich dann das eingebette VBA-Projekt einsehen, aber es war leider mit einem Passwort geschützt.
Dafür gibt es aber einen einfachen Trick: Man öffnet das Excel-Dokument mit einem Hex-Editor und ersetzt alle Strings „DPB“ nach „DPx“ und öffnet dann das VBA-Projekt. Es wird zwar eine Fehlermeldung angezeigt, aber das Passwort ist Geschichte!
So nun hier ein Auszug aus dem VBA-Projekt:
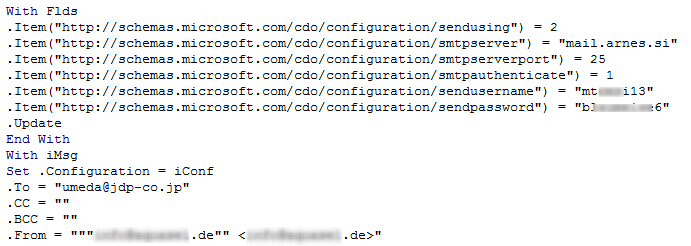
Auszug VBA-Projekt
Es ist also nun klar, dass das Excel-Formular wie vermutet über einen SMTP-Server (mail.arnes.si) die Formulardaten an umeda-at-jdp-co.jp verschickt und als Absender eine DE-Email-Adresse verwendet.
Es scheint so, dass bei den Antivirus-Herstellern ein zu hoher Automatismus eingeführt wurde. Die manuelle Prüfung der Excel-Datei durch einen Menschen hätte ergeben, dass es sich hier um eine Phishing-Mail handelt und sie müsste meiner Meinung nach blockiert werden. Ich habe die Datei noch einmal manuell an unseren Virenscanner-Hersteller geschickt, mal sehen wie die Antwort aussehen wird.
Klar kann man argumentieren, dass in der Datei kein Schadcode enthalten ist, der auf dem Rechner etwas Böses tut, allerdings blockieren Virenscanner auch Phising URLs, warum dann nicht Phishing-Formulare in Excel-Dokumenten?