
Install Windows Server 2008 R2 to a different drive letter than C:
 Comments(2)
This blog entry will show how to do a native install of Windows Server 2008 R2 to a different driveletter with a minimum effort. You only need a thumbdrive, a text-editor and a Windows Server 2008 R2 DVD (it should also work with Windows 7).
On your thumbdrive (USB-Stick) create a file named „AutoUnattended.xml“ with the following content:
<!–?xml version=“1.0″ encoding=“utf-8″?–>
<unattend xmlns=“urn:schemas-microsoft-com:unattend“>
<settings pass=“windowsPE“>
<component name=“Microsoft-Windows-Setup“ processorarchitecture=“amd64″ publickeytoken=“31bf3856ad364e35″ language=“neutral“ versionscope=“nonSxS“ xmlns:wcm=“http://schemas.microsoft.com/WMIConfig/2002/State“ xmlns:xsi=“http://www.w3.org/2001/XMLSchema-instance“>
<diskconfiguration>
<willshowui>OnError</willshowui>
<disk wcm:action=“add“>
<createpartitions>
<createpartition wcm:action=“add“>
<order>1</order>
<size>500</size>
<type>Primary</type>
</createpartition>
<createpartition wcm:action=“add“>
<extend>true</extend>
<order>2</order>
<type>Primary</type>
</createpartition>
</createpartitions>
<modifypartitions>
<modifypartition wcm:action=“add“>
<active>true</active>
<format>NTFS</format>
<label>System Reserved</label>
<order>1</order>
<partitionid>1</partitionid>
</modifypartition>
<modifypartition wcm:action=“add“>
<format>NTFS</format>
<label>SYSTEM</label>
<letter>M</letter>
<order>2</order>
<partitionid>2</partitionid>
</modifypartition>
</modifypartitions>
<diskid>0</diskid>
<willwipedisk>true</willwipedisk>
</disk>
</diskconfiguration>
<imageinstall>
<osimage>
<installto>
<diskid>0</diskid>
<partitionid>2</partitionid>
</installto>
<willshowui>OnError</willshowui>
</osimage>
</imageinstall>
<userdata>
<accepteula>true</accepteula>
</userdata>
</component>
</settings>
</unattend>
You can download the file here
Make sure, you change the line
<letter>M</letter>
to your needs, where M is the drive letter you want to assign to the system partition. Save the file and attach the thumbdrive to the target computer.
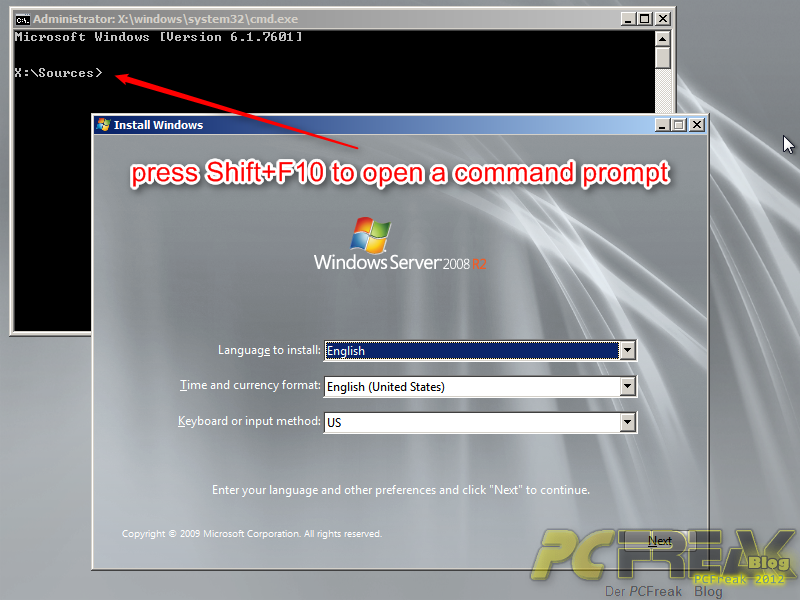
Insert the Windows Server 2008 R2 DVD in the target computer and boot into setup.
At the first screen press Shift + F10 to open a command prompt
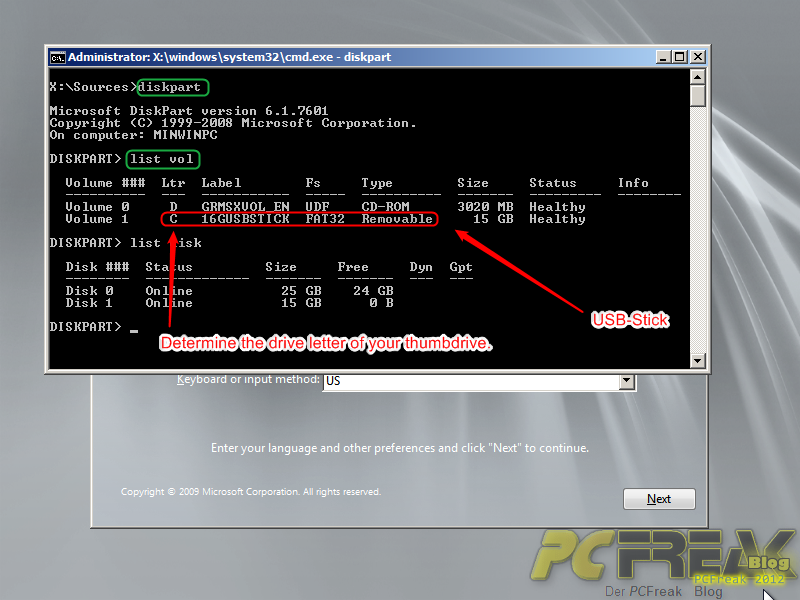
Determine which drive letter your thumbdrive has using diskpart.
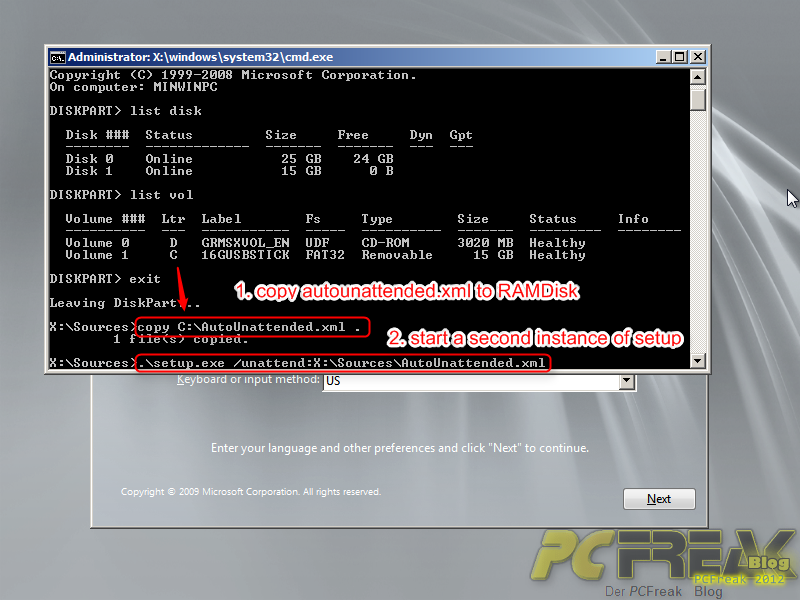
Copy the file AutoUnattended.xml from your thumbdrive to RamDisk and start a second instance of setup.exe that will use our AutoUnattended.xml file.
.\setup.exe /unattend:X:\Sources\AutoUnattended.xml
A new instance of setup.exe will start using our custom installation file.
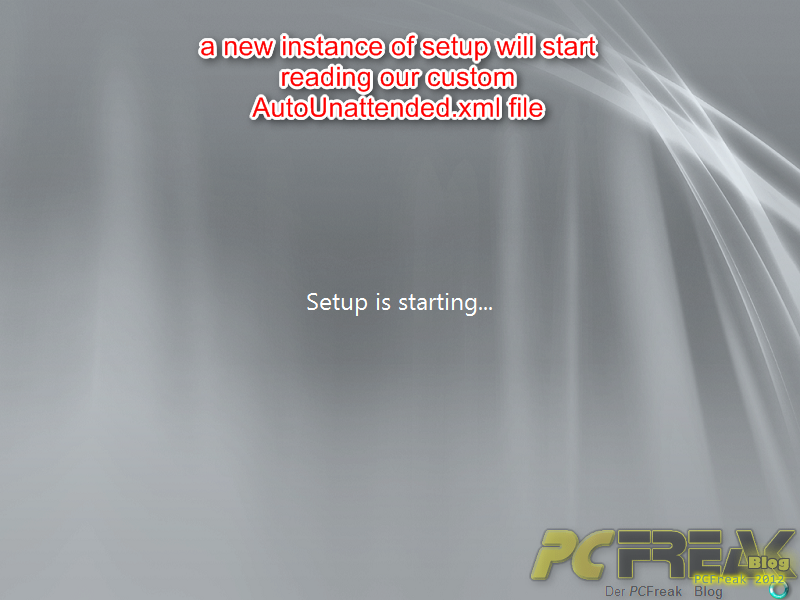
Continue with the setup as usual.

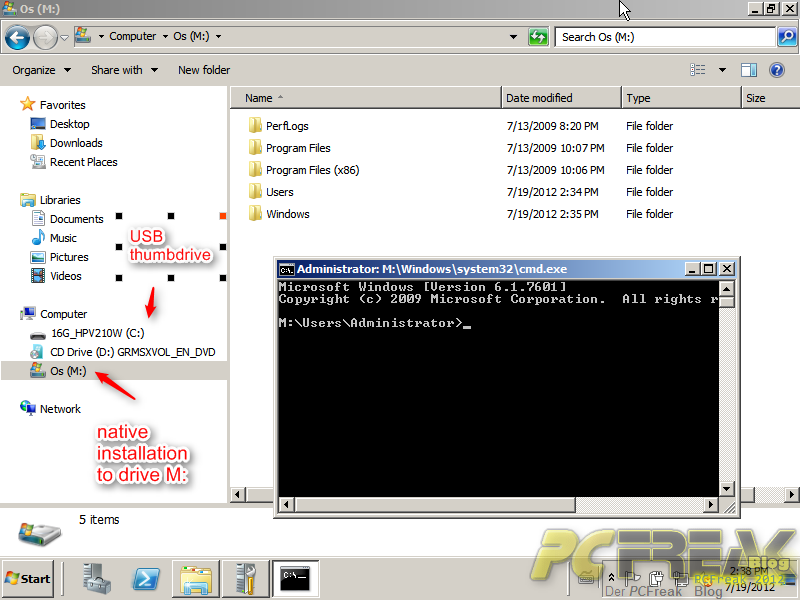
After setup is complete you can see the result. Windows is installed on drive M: . My thumbdrive uses the next available driveletter which is C: and the DVD is on the next free one which is D:.
Mission accomplished – Congratulations!
Why are we doing this? – Well, if you setup a Remote Desktop Services presenting Seamless RemoteApps it is very convenient for your users to have their local drived mapped with the same driveletters. If the operating system is on M: the local drives you bring into the Remote Desktop session start enumerating at C: . I know that there is a better way doing this with the „Windows Automated Installation Kit (AIK)“ but I didn’t want to install that big software and mess arround with .wim images.
If you find this entry useful, feel free to write a comment.
I had an old HP DL360 server with USB and a CDROM drive, no DVD drive. I managed to change the Win2008 R2 C: drive to M: drive by using the {regedit rename „\DosDevices\C:“ to „\DosDevices\M:“} method AND the pcfreak method combined.
I first loaded a USB stick with both the „Windows 2008 R2 ISO“ file, and in another folder „a direct copy of the files and folders from the Windows 2008 R2 DVD“ (using copy paste), and the unattended.xml file.
My HP DL360 server could only be loaded with an OS if you used the Smartstart CDROM ver8.40 (after upgrading the BIOS of course). So I did that and used the ISO file for install. Done and worked 100%. DON’T load anything else onto the server at this point.
I then opened regedit, Go to HKEY_LOCAL_MACHINE\SYSTEM\MountedDevices\, Rename the following REG_BINARY name of \DosDevices\C: to \DosDevices\M: and then rebooted the server.
Just before the OS startup pressed F8 to get to the Windows recovery options. Choose „Restore“ from the menu, then „Command Prompt“. From here I found the USB stick was using E: drive, Go to the Windows 2008 R2 DVD folder, NOT the ISO folder, run setup using the unattended.xml file and setup starts. It runs by itself and completely reloads the server. End result is Windows 2008 R2 full reinstalled and working 100% as M: drive.
To get the C: drive environment I needed for my Remote Desktop terminal services users, I simply created and added a batch file to their login using the „subst“ command to map their profile as their C: drive. (subst C: M:\users\%username%). Done. Each user now has their own C: drive for legacy apps to use. Windows 2000 and 2003 terminal server used to do this by default but for some strange reason Windows2008 no longer does this. So this is how I got it to work.
Hope this helps. From Mitch
Thankyou sooo much for posting this, Ive been wasting time messing around with WIM images all day. such a simple solution.