PCFreak Logo (c) Der PCFreak

Archive for the 'Software' Category


Shoets – Screenshot utility for the logon screen Kommentare deaktiviert für Shoets – Screenshot utility for the logon screen


Have you ever wanted to create a screenshot of the Windows(R) Logon Screen? – Impossible?

No, with Shoets, a small utility I wrote using the AutoIt programming language you can easily create screenshots at the Windows(R) logon screen.

You can get the tool here (source included): shoets-screenshooter-for-logon-screen.zip

  1. Unzip the archive
  2. Run Shoets.exe
  3. Lock your computer
  4. On XP and 2003 press 5x „SHIFT“ on your keyboard
    On other OSs click the „Ease of Access button“
  5. Press „s“ as often as you like to create a screenshot
  6. Press „x“ to exit the utility
  7. Login back to windows and enjoy your screenshots!

I will be interested in your feedback!

Howto compile oathtool on Windows with Cygwin 2


If you want to compile oathtool on Windows using Cygwin you can use this small Howto:

    1. Install Cygwin
    2. Install the following packages into Cygwin (maybe you need less packages, but this is myy actual list grabbed with cygcheck.exe -c) or just try, wait for errors and install the packages based on the error you get._autorebase, _update-info-dir, alternatives, autobuild, autoconf, autoconf2.1, autoconf2.5, automake, automake1.10, automake1.11, automake1.4, automake1.5, automake1.6,
      automake1.7, automake1.8, automake1.9, base-cygwin, base-files, bash, binutils, bzip2, ca-certificates, coreutils, cpio, crypt, cvs, cvsps, cygutils, cygwin, cygwin-doc, dash,
      diffutils, dos2unix, editrights, file, findutils, gawk, gcc-core, gcc-g++, gcc-mingw-core, gcc-mingw-g++, gdb, gettext, git, grep, groff, gzip, ipc-utils, less, libasn1_8, libattr1,
      libbz2_1, libcom_err2, libcurl4, libdb4.5, libexpat1, libffi4, libgcc1, libgcrypt11, libgdbm4, libgmp3, libgnutls26, libgpg-error0, libgssapi3, libheimbase1, libheimntlm0, libhx509_5,
      libiconv2, libidn11, libintl3, libintl8, libkrb5_26, libltdl7, liblzma5, liblzo2_2, libncurses10, libncurses9, libncursesw10, libopenldap2_3_0, libopenssl098, libopenssl100, libpcre0,
      libpopt0, libreadline7, libroken18, libsasl2, libsigsegv2, libsqlite3_0, libssh2_1, libssp0, libstdc++6, libtasn1_3, libtool, libwind0, login, m4, make, man, mercurial, mingw-runtime,
      mingw-w32api, mintty, perl, perl-Error, python, rebase, run, sed, tar, terminfo, texinfo, tzcode, w32api, wget, which, xorg-util-macros, xz, zlib0
    3. Download the source from here. I used oath-toolkit-1.12.4.tar.gz
    4. Unzip the source to your Cygwin home folder
      tar xzvf oath-toolkit-1.12.4.tar.gz
    5. Jump into the newly created folder
      cd  oath-toolkit-1.12.4
    6. Execute the following commands
      ./configure
      make
    7. Pickup the following files and copy them to a separate folder
      <cygwinbinfolder>\cygwin1.dll
      <cygwinhome>\oath-toolkit-1.12.4\liboath\.libs\cygoath-0.dll
      <cygwinhome>\oath-toolkit-1.12.4\\oathtool\.libs\oathtool.exe
    8. You can now run oathtool (without Cygwin) from the newly created folder


If you don’t want to compile yourself, you can download my compiled version here (if you trust me!).

Guacamole with RDP on Debian Wheezy Kommentare deaktiviert für Guacamole with RDP on Debian Wheezy

Guacamole is an HTML5 web appliation that provides access to desktop environments using remote desktop protocols such as RDP or VNC. No plugins are needed. This means, you can RDP from your iPhone or iPad from your browser. I did a full howto on my Wiki. Look here: http://bit.ly/guacamole-howto The result looks like this:

Audiograbber und Mp3Tag unter Linux 2

Audiograbber und Mp3tag sind meiner Meinung nach zwei Programme, die man im Umgang mit MP3-Dateien unbedingt benötigt. Mit Audiograbber kann man aus Musik-CDs oder Musikdateien MP3-Dateien erstellen. Mp3tag ist ein sehr komfortables Programm, um die Tags der MP3-Dateien zu ändern, MP3-Dateien umzubenennen uvm.

Da ich mittlerweile privat fast ausschließlich mit Linux arbeite, mir die obigen Programme jedoch sehr ans Herz gewachsen sind, hier eine kurze Anleitung wie man diese Programme mit WINE unter Linux (in meinem Fall Kubuntu 11.10) problemlos zum Laufen bekommt.

Zunächst benötigen wir die Setup-Dateien für Audiograbber, Mp3tag und das Lame-Plugin für Mp3tag, diese gibt es über die Homepages der beiden Tools:

  Audiograbber http://www.audiograbber.de
  Mp3tag http://www.mp3tag.de/

Im Detail sind das dann folgende Dateien:

Audiograbber
agsetup183se.exe

Lame Plugin für Audiograbber
lameplugin_setupX86.exe oder lameplugin_setupX64.exe

Mp3tag
mp3tagv250setup.exe

Um die obigen Windows Programme unter Linux zu installieren muss zunächst WINE installiert werden. Mit WINE können viele Windows Programme unter Linux installiert und ausgeführt werden.

Der Befehl

  sudo apt-get install wine

in einem Terminal installiert WINE

WINE arbeitet mit sogenannten „Flaschen“, man kann sich diese „Flaschen“ als jeweils separate Windows-Instanzen vorstellen. Dadurch ist es z.B. möglich, 2 Windows-Programme, die sich nicht „vertragen“ in jeweils separate „Flaschen“ zu installieren oder mehrere Windows-Programme die sich untereinander nicht beeinflussen in eine „Flasche“ zu packen. Ich trenne meine „Flaschen“ gerne nach Aufgabengebiet. Da sich Audiograbber und Mp3tag problemlos vertragen, möchte ich sie beide in eine „Flasche“ installieren. Diese „Flasche“ soll im Ordner /home/pcfreak/winprogs/mp3 liegen, also lege ich diesen Ordner mit folgendem Befehl in einem Terminal an:

  mkdir -p /home/pcfreak/winprogs/mp3

Um WINE mitzuteilen, dass es den soeben angelegten Ordner als Ordner für eine „Flasche“ benutzen soll, muss man die Variable WINEPREFIX vor der Installation von Programmen definieren. Folgender Befehl übernimmt dies für den soeben angelegten Ordner:

  export WINEPREFIX=/home/pcfreak/winprogs/mp3

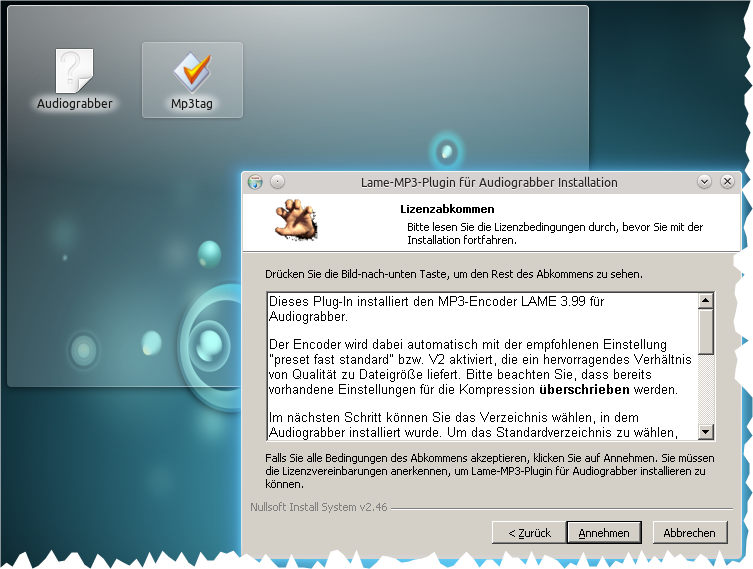
Nun können wir mit der Installation beginnen. Wir beginnen mit Mp3tag. Die Befehle werden wieder in einem Terminal eingegeben und wenn das grafische Setup von Mp3tag startet, bedienen wir es wie wenn wir das Programm unter Windows installieren würden.

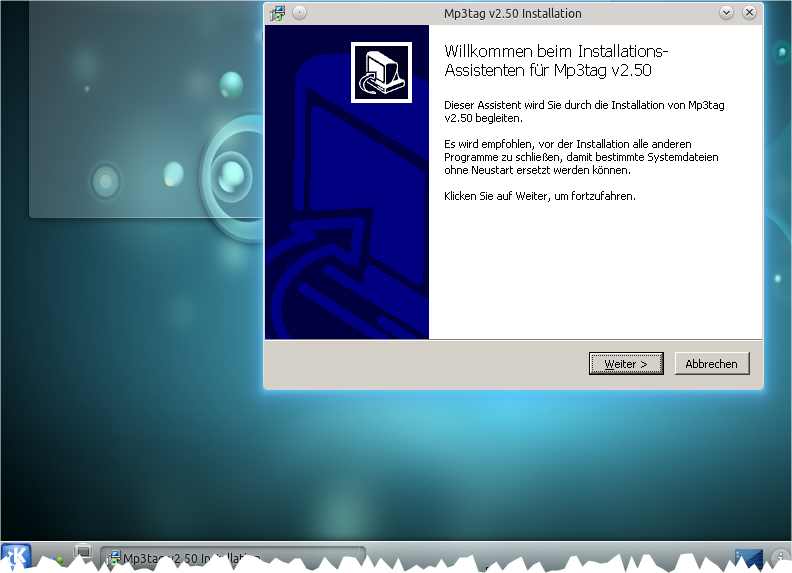
Mit der auf dem Desktop erstellten Verknüpfung kann man nun Mp3tag starten. Wer das Ganze noch mit einem schönen Icon versehen möchte, der muss eben selbst Hand anlegen und für die Desktop-Verknüpfung schnell mit The Gimp ein Symbol erstellen.
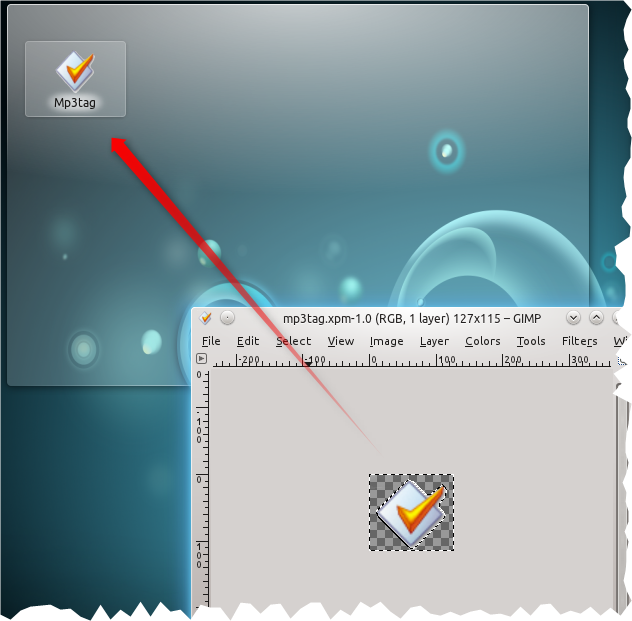
Da wir nun wissen, wie man ein Windows-Programm mittels WINE installiert, führen wir nun die Installation von Audiograbber und dem Lame-Mp3-Plugin auf die gleiche Weise durch:

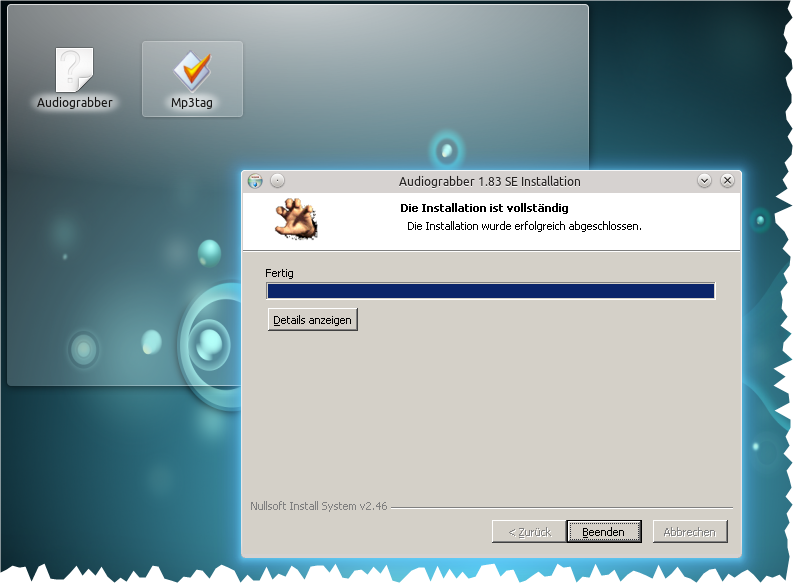
Nun noch das Lame-Plugin für Audiograbber:

Auch für Audiograbber habe ich mir selbst ein Symbol erstellt und es für die Desktop-Verknüpfung verwendet:
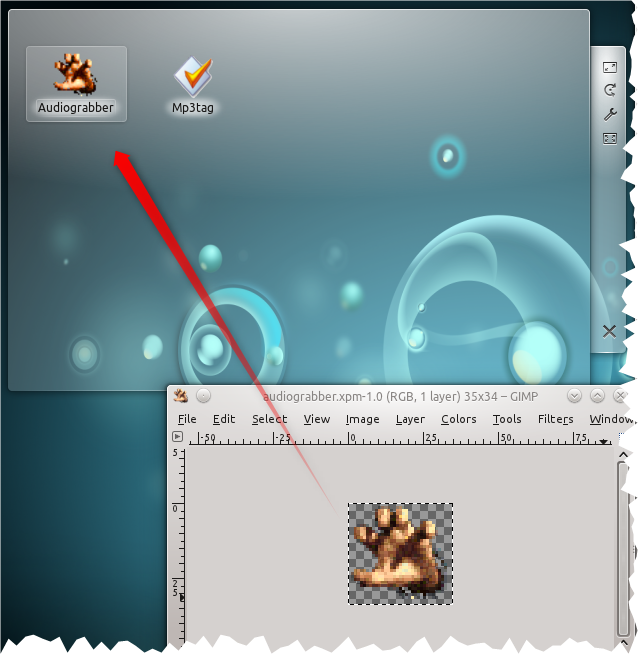
Beide Programme lassen sich nun problemlos vom Kubuntu Desktop starten und verwenden!
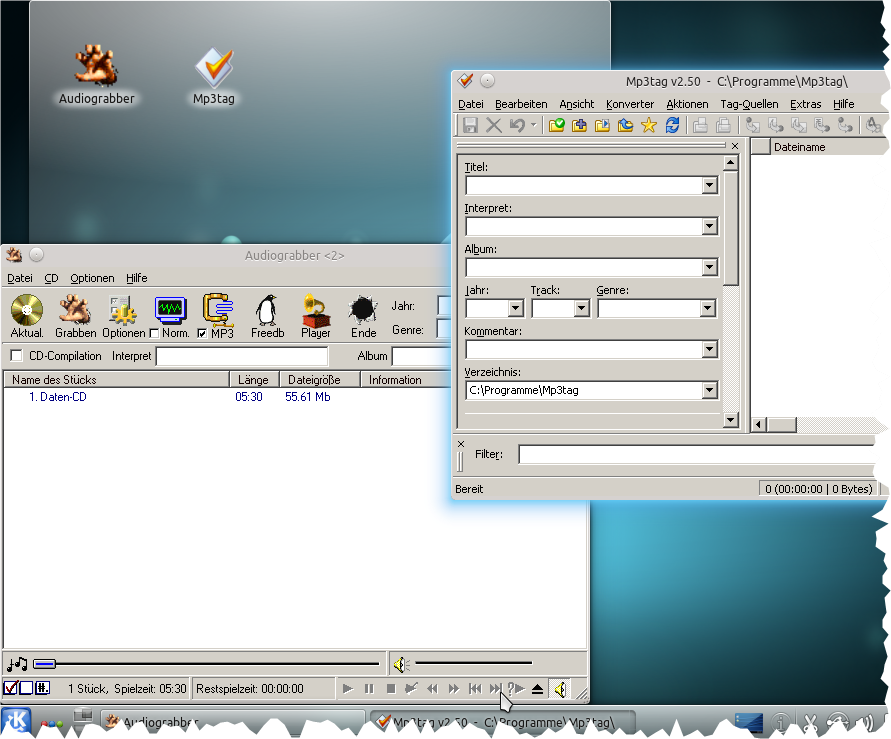
Beide Programme funktionieren wirklich einwandfrei. Mit Audiograbber kann problemlos aus WINE heraus das CD-Rom zum „grabben“ von Audio angesprochen werden. Innerhalb der Windows-Programme stehen die wichtigsten Ordner als Links zu den Ordnern in Kubuntu (Musik, Bilder usw.) bereit, sodass man sich schnell zurechtfindet.

Top Screenshot und Screenrecording Software 1

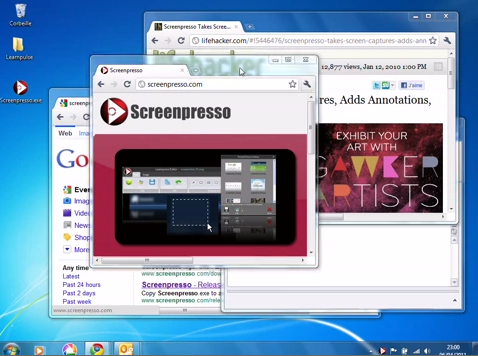
Ich möchte kurz auf ein super Programm hinweisen, welches mir von meinem Arbeitskollegen empfohlen wurde. Ich bin total begeisert. Das besagte Programm heißt Screenpresso und ist für Windows.
Man kann damit nicht nur Screenshots machen, sondern auch Videos (Freeversion nur 20 Sekunden). Nahezu alle Funktionen sind uneingeschränkt privat und kommerziell nutzbar. Hier sind die Features aufgelistet und die Free- und Proversion gegenübergestellt.

Hier das Feature Video auf Youtube.


Endlich mal eine Software die sehr viele Funktionen aufgeräumt und mit einem tollen UI unter einen Hut bekommt.

Ich habe mir Screenpresso Pro bestellt, da ich die Videofunktion sehr gut gebrauchen kann!

PAExec – PsExec zum Verteilen Kommentare deaktiviert für PAExec – PsExec zum Verteilen

Fast jeder Administrator kennt das Tool PsExec von Sysinternals (Mark Russinovich). Es hat leider 2 störende Probleme:

  • man darf es nicht mit eigenen Programmen distributieren
  • Benutzernamen und Passwörter werden im Klartext übergeben

Abhilfe schafft das kleine Programm PAExec, welches von jedermann heruntegeladen werden kann und explizit in OpenSource, Freeware und sogar kommerziellen Produkten eingesetzt werden darf.

PAExec kann hier heruntergeladen werden: http://www.poweradmin.com/PAExec/

Hier die Hilfe zum Programm:

Usage: PAExec [\\computer[,computer2[,…] | @file]][-u user [-p psswd][-n s][-l]
[-s|-e][-x][-i [session]][-c [-f|-v] [-csrc path]][-lo path][-rlo path][-ods]
[-w directory][-d][-][-a n,n,…][-dfr] cmd [arguments]

Standard PAExec\PsExec command line options:

-a Separate processors on which the application can run with commas where 1 is the lowest numbered CPU. For example, to run the application on CPU 2 and CPU 4, enter:
-a 2,4
-c Copy the specified program to the remote system for execution. If you omit this option the application must be in the system path on the remote system.
-d Don’t wait for process to terminate (non-interactive).
-e Does not load the specified account’s profile.
-f Copy the specified program even if the file already exists on the remote system.
-i Run the program so that it interacts with the desktop of the specified session on the specified system. If no session is specified the process runs in the console session.
-h [NOT IMPLEMENTED] If the target system is Vista or higher, has the process run with the account’s elevated token, if available.
-l [EXPERIMENTAL] Run process as limited user (strips the Administrators group and allows only privileges assigned to the Users group). On Windows Vista the process runs with Low Integrity.
-n Specifies timeout in seconds connecting to remote computers.
-p Specifies optional password for user name. If you omit this you will be prompted to enter a hidden password.
-s Run the process in the System account.
-u Specifies optional user name for login to remote computer.
-v Copy the specified file only if it has a higher version number or is newer on than the one on the remote system.
-w Set the working directory of the process (relative to remote computer).
-x Display the UI on the Winlogon secure desktop (local system only).
-priority Specifies -low, -belownormal, -abovenormal, -high or -realtime to run the process at a different priority. Use -background to run at low memory and I/O priority on Vista.
computer Direct PAExec to run the application on the remote computer or computers specified. If you omit the computer name PAExec runs the application on the local system, and if you specify a wildcard (\\*), PAExec runs the command on all computers in the current domain.
@file PAExec will execute the command on each of the computers listed in the file.
program Name of application to execute.
arguments Arguments to pass (note that file paths must be absolute paths on the target system).

Additional options only available in PAExec:

-cnodel If a file is copied to the server with -c, it is normally deleted (unless -d is specified). -cnodel indicates the file should not be deleted.
-csrc When using -c (copy), -csrc allows you to specify an alternate path to copy the program from. Example: -c -csrc „C:\test path\file.exe“
-dbg Output to DebugView (OutputDebugString)
-dfr Disable WOW64 File Redirection when launching the new process
-lo Log Output to file. Ex: -lo C:\Temp\PAExec.log
The file will be UTF-8 with a Byte Order Mark at the beginning.
-rlo Remote Log Output: Log from remote service to file (on remote server).
Ex: -rlo C:\Temp\PAExec.log
The file will be UTF-8 with a Byte Order Mark at the beginning.

The application name, copy source, working directory and log file entries can be quoted if the path contains a space. For example:
PAExec \\test-server -w „C:\path with space“ „C:\program files\app.exe“

Input is sent to the remote system when Enter is pressed, and Ctrl-C stops the remote process and stops PAExec.

PsExec passes all parameters in clear-text. In contrast, PAExec will scramble the parameters to protect them from casual wire sniffers, but they are NOT encrypted. Note that data passed between PAExec and the remote program is NOT scrambled or encrypted — the same as with PsExec.

PAExec will return the error code it receives from the application that was launched remotely. If PAExec itself has an error, the return code will be one of:
-1 = internal error
-2 = command line error
-3 = failed to launch app (locally)
-4 = failed to copy PAExec to remote (connection to ADMIN$ might have failed)
-5 = connection to server taking too long (timeout)
-6 = PAExec service could not be installed/started on remote server
-7 = could not communicate with remote PAExec service
-8 = failed to copy app to remote server

NetDrive – FTP und WebDAV als Laufwerk einbinden Kommentare deaktiviert für NetDrive – FTP und WebDAV als Laufwerk einbinden

NetDriveDie für den Heimgebrauch kostenlose Software NetDrive™ von BiDrive Inc. erlaubt es FTP- oder WebDAV-Server unter Windows als Laufwerke einzubinden. Dadurch kann man mit den Remote-Laufwerken direkt mit dem Windows Explorer arbeiten oder mit anderen Programmen direkt darauf zugreifen. Die Laufwerke können direkt beim Windows Start eingebunden werden. Das Programm ist lauffähig unter Windows XP, VISTA, 7, Windows Server 2003 und Windows Server 2008. Es werden sowohl 32- als auch 64bit-Betriebssysteme unterstützt. Entwickler können auch das käuflich erwerbliche SDK verwenden um die Funktionalitäten in eigene Programme einzubinden.
Homepage: http://www.netdrive.net/

PureSync – kostenloses Synchronisationstool Kommentare deaktiviert für PureSync – kostenloses Synchronisationstool


PureSync (vormals FireSync) sychronisiert Dateien und Ordner. Die Synchronisation erfolgt entweder automatisch, zeitgesteuert oder manuell. Jeweils vor und nach dem Start der Synchronisation erhält man ein Fenster, welches die Änderungen darstellt. Unter anderem unterstützt das Programm auch den Batchbetrieb und Netzlaufwerke. Es kann das Einstecken eines USB-Sticks automatisch erkennen und dann starten. Eine sehr nette Funktion, ist die Möglichkeit im Ziel die Dateien anhand ihres Datums in Ordner zu strukturieren. Das ist sehr hilfreich beim Herunterladen von Bildern, z.B. von einer Kamera. Das Programm ist mehrsprachig, es stehen die Sprachen Deutsch, Englisch, Spanisch, Französisch, Italienisch, Holländisch, Norwegisch, Slowakisch und Schwedisch zur Verfügung. Für den privaten Gebrauch ist das Programm kostenlos. Mehr dazu auf der Homepage von PureSync.

Use Google Authenticator to login to your linux box Kommentare deaktiviert für Use Google Authenticator to login to your linux box

I found some nice tutorials on the internet to use Google Authenticator with linux. Since I am a fan of full featured copy/paste tutorials that work I created my own. You can find it here:


Use Google Authenticator to login to a Linux host


Thanks to the following articles:

Nuno Goncalves
Use Google Authenticator to login to a Linux PC

Keith Garner
Google Authenticator (and implementing it on Linux)

Jens Roesen
Zwei-Faktor-Authentifizierung mit Google Authenticator und des kleinen Mannes Nucular Code Sealed Authenticator System

Pre-Installing Geeksphone Zero Drivers to Windows 7 before initial plugin of device Kommentare deaktiviert für Pre-Installing Geeksphone Zero Drivers to Windows 7 before initial plugin of device


My girlfriend has a Geeksphone Zero (and it runs stable since I put SuperOSR on it…). Now she got a new notebook, a Lenvo S205 and I wanted to pre-install the Geeksphone drivers before the Geeksphone has ever been connected to the machine. As I found out, there is a way and here is how:

First of all get the drivers from the Geeksphone Forum: http://forum.geeksphone.com/index.php?topic=1830.0
The links are:

ZERO DRIVERS NT
  http://www.geeksphone.com/zerohome/ZERO_DRIVERS_NT.rar
  http://www.megaupload.com/?d=V0W1DLM9

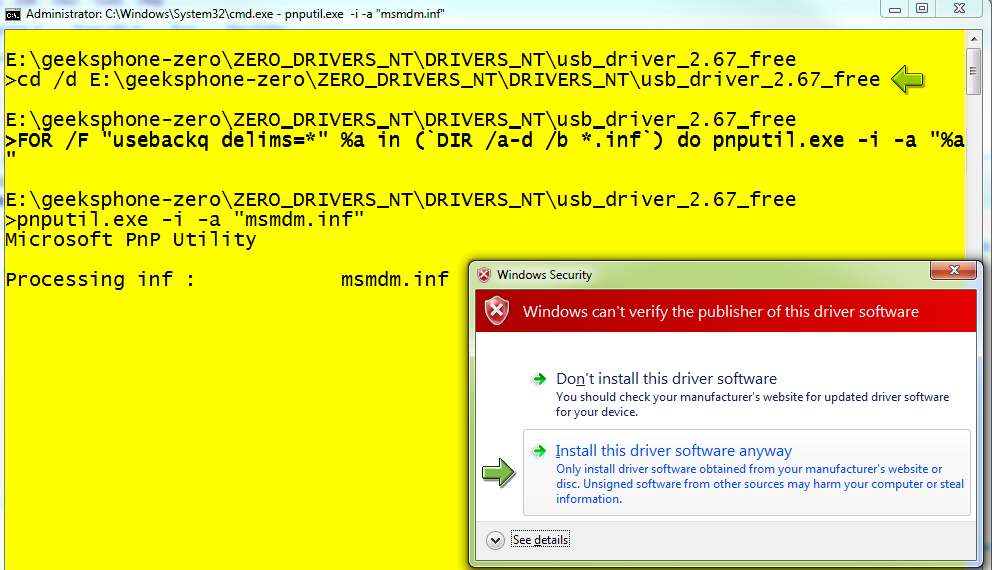
Unzip the drivers, then open a CMD.EXE as Administrator, jump the the folder with the extracted files.
Please make sure, that you are in the correct folder when executing the following command (modify with your extraction path):

 CD „E:\geeksphone-zero\ZERO_DRIVERS_NT\DRIVERS_NT\usb_driver_2.67_free“
 FOR /F „usebackq delims=*“ %a in (`DIR /a-d /b *.inf`) do pnputil.exe -i -a „%a“

For each driver staging into the windows device database you will get a popup asking you for confirmation to install the drivers, since they are not signed as shown in this screen:

Select „Install this driver software anyway“ for all the drivers you install at this point.

After installation if you plugin a Geeksphone Zero all drivers needed will already present and all devices will be detected without further questions. Good! – If your girlfriend has a geeksphone, like mine does.

On Windows XP you should just be able to right-click the *.inf files and select „install“ to copy them to your system.

This article is in English to support a larger community. Use Google Translate to translate to your language

« Vorherige SeiteNächste Seite »